- Ensuring you have the right database expanded, right click on the "Tables" icon and select "New Table...":
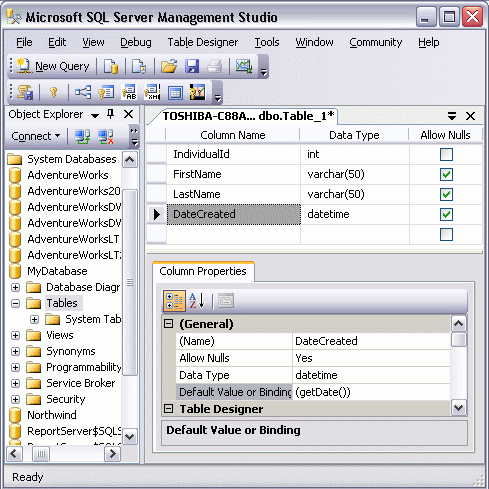
- While you have this screen open, do the following:
- Using the values in the screenshot, complete the details in the "Column Name" column, the "Data Type" column, "Length" column, and "Allow Nulls" column.
- Make the IndividualId column an "identity column", by setting "Is Identity" to "Yes" (this option is under the "Identity Specification" section in the bottom pane). Note that to set values in the bottom pane, you need to select the column name in the top pane first). This column is going to be an auto-number column - it will contain an incrementing number for each record that is created.
- Set the "Default Value" of the DateCreated column to (getdate()). (This will automatically insert the current date into that field for each new record).
What we are doing at this stage, is creating the column names, specifying the type of data that can be entered into them, and setting default values. Restricting the data type for each column is very important and helps maintain data integrity. For example, it can prevent us from accidentally entering an email address into a field for storing the current date.
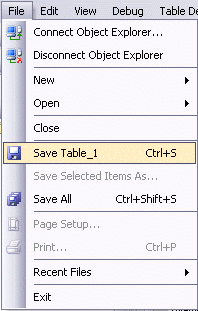
- Save the table by selecting File > Save Table_1:
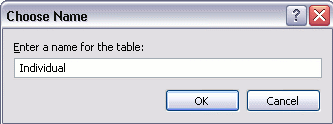
- When prompted, name your table:
Your New Table
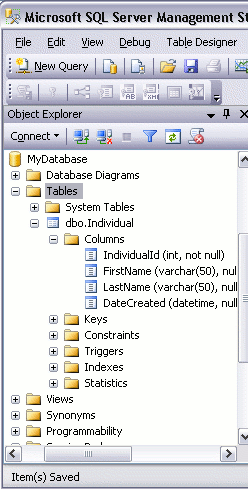
Now that you've created a new table, it will appear under your database in the "Tables" section.
or
Synatx:
CREATE TABLE table_name
(
column_name1 data_type,
column_name2 data_type,
column_name3 data_type,
....
)
Ex:CREATE TABLE Persons
(
P_Id int,
LastName varchar(255),
FirstName varchar(255),
Address varchar(255),
City varchar(255)
)

 What we are doing at this stage, is creating the column names, specifying the type of data that can be entered into them, and setting default values. Restricting the data type for each column is very important and helps maintain data integrity. For example, it can prevent us from accidentally entering an email address into a field for storing the current date.
